Layers
Layers are an important component of GDSII design. Layers in a GDS file are defined using two integers (0-255): a layer and a datatype. In PHIDL, the layer can be specified…
as a single number
0-255representing the gds layer number (gds datatype will be set to0)as a 2-element list
[0,1]or tuple(0,1)representing the (layer, datatype)as a Layer / LayerSet object
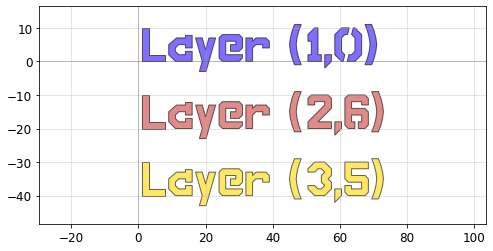
To begin, let’s make a new blank device D and add some text-polygons to it using different methods of layer entry:
[2]:
import phidl.geometry as pg
from phidl import Device, Layer, LayerSet
from phidl import quickplot as qp


D = Device()

# Specify layer with a single integer 0-255 (gds datatype will be set to 0)
layer1 = 1

# Specify layer as 1, equivalent to layer = 2, datatype = 6
layer2 = (2,6)

# Specify layer as 2, equivalent to layer = 2, datatype = 0
layer3 = Layer(gds_layer = 3, gds_datatype = 5, color = 'gold')

D << pg.text('Layer (1,0)', layer = layer1)
D << pg.text('Layer (2,6)', layer = layer2).movey(-20)
D << pg.text('Layer (3,5)', layer = layer3).movey(-40)

qp(D)
Multiple layers
Say we want to create the same ellipse on several different layers. We can do that by using a Python set of layers, which is created using the curly brackets {} (similar to a dict but without colons). So if we want to add it to four layers, say: - layer 1 / datatype 0 - layer 3 / datatype 5 - layer 3 / datatype 6 - layer 7 / datatype 1
[3]:
# Note each element of the set must be a valid layer input by itself
my_layers = {1, (3,5), (3,6), (7,8)}
D = pg.ellipse(layer = my_layers)
Note that although we specified four different layers, it did not produce four separate ellipse Devices–instead, it produced one Device with all four ellipse polygons inside that single Device.
LayerSet
PHIDL also has a convenience container for layers called a LayerSet, which lets you conveniently call each Layer object just by its name. You can also specify the layer color using an RGB triplet e.g (0.1, 0.4, 0.2), an HTML hex color (e.g. #a31df4), or a CSS3 color name (e.g. 'gold' or 'lightblue' see http://www.w3schools.com/colors/colors_names.asp ) The 'alpha' argument also lets you specify how transparent that layer should look when using quickplot() (has no
effect on the written GDS file).
We construct a layerset by starting with a blank one, and then using the add_layer() function:
[4]:
ls = LayerSet() # Create a blank LayerSet

ls.add_layer(name = 'au', gds_layer = 4, gds_datatype = 0,
             description = 'Gold wiring', color = 'goldenrod')
ls.add_layer(name = 'nb', gds_layer = 5, gds_datatype = 0,
             description = 'Niobium liftoff', color = (0.4,0.5,0.7))
ls.add_layer('nb_etch', 6, 0, color = 'lightblue', alpha = 0.2)
ls.add_layer('silicon', 8, 2, color = 'green', alpha = 0.4)
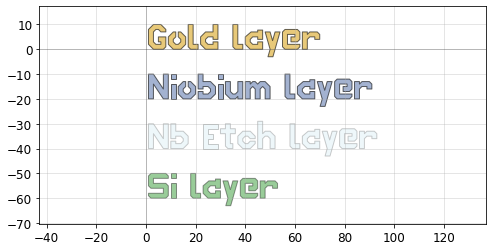
Now that our layers are defined, we can call them from the LayerSet in the same way we would from a dictionary, where the name becomes the key:
[5]:
D = Device()

gold_layer = ls['au']

D.add_ref( pg.text('Gold layer', size = 10, layer = ls['au']) ).movey(0)
D.add_ref( pg.text('Niobium layer', size = 10, layer = ls['nb']) ).movey(-20)
D.add_ref( pg.text('Nb Etch layer', size = 10, layer = ls['nb_etch']) ).movey(-40)
D.add_ref( pg.text('Si layer', size = 10, layer = ls['silicon']) ).movey(-60)

qp(D)
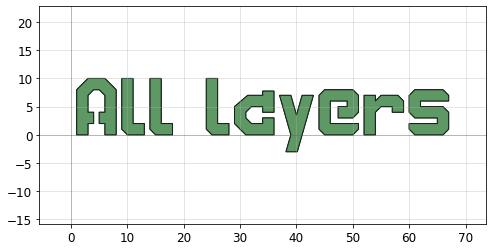
We can additionally use a LayerSet to add the same structure to several layers at once by passing the whole layerset to the layer argument. Note that since they all overlap, it will look like a single object (but rest assured there are multiple layers)
[6]:
T = pg.text('All layers', layer = ls)
qp(T)
If we want to examine any single layer, we can call them by their names, for example
[7]:
print(ls['nb'])
Layer (name nb, GDS layer 5, GDS datatype 0, description Niobium liftoff, color #6680b2)
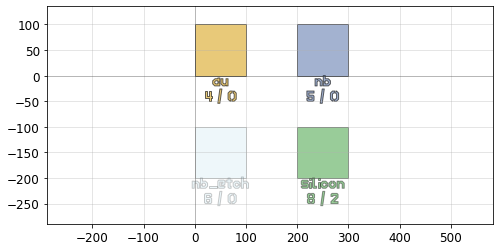
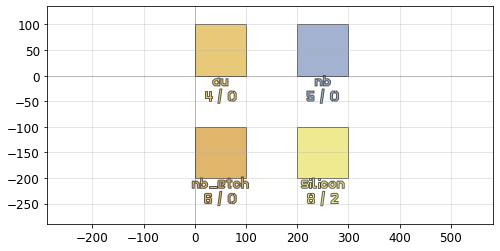
We can quickly preview our color scheme using the pg.preview_layerset() function as well.
[8]:
D = pg.preview_layerset(ls)
qp(D)
Making KLayout .lyp files
We can even save the LayerSet as a KLayout .lyp file (“layer properties” file), useful for getting the color scheme in KLayout to match quickplot
[9]:
import phidl.utilities as pu
pu.write_lyp('my_layer_properties_file.lyp', layerset = ls)
Ignoring layers with None
In some cases, you may want to not use one of the layers for a given geometry. PHIDL makes that easy by letting you pass None to any function that accepts layers. For instance, say we have the following structure with three distinct layers
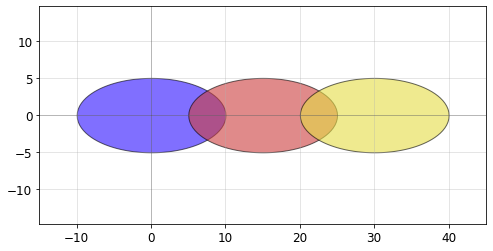
[10]:
def many_ellipses(layer1 = 1, layer2 = 2, layer3 = 3):
    D = Device()
    D << pg.ellipse(layer = layer1)
    D << pg.ellipse(layer = layer2).movex(15)
    D << pg.ellipse(layer = layer3).movex(30)

    return D

qp(many_ellipses(layer1 = 1, layer2 = 2, layer3 = 3))
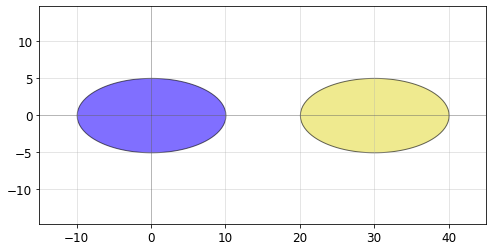
Now say we want to remove the middle layer entirely. We note that it’s defined by the layer layer2, so we can set that to None and it won’t be added at all:
[11]:
qp(many_ellipses(layer1 = 1, layer2 = None, layer3 = 3))
Removing layers
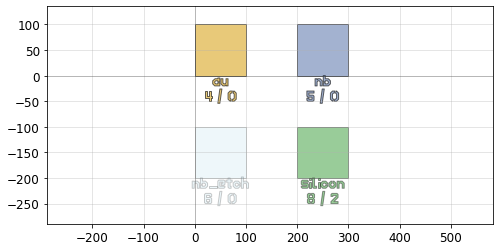
We can remove the unwanted layers using the remove_layers() function. Let’s again start with our pg.preview_layerset() Device above:
[12]:
D = pg.preview_layerset(ls)
qp(D)
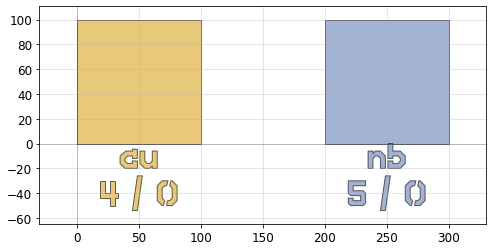
Now let’s remove layers 6 and 8. This should leave us with just the gold (layer 4,0) and nb (5,0) layers.
[13]:
D.remove_layers(layers = [6,8])
qp(D)
Whoops! Note that because we specified just an 8 as the layer we wanted to remove, PHIDL interpreted it as (8,0), so it didn’t remove the the silicon layer that is actually on (8,2). Let’s try again:
[14]:
D.remove_layers(layers = [(8,2)])
qp(D)
That’s better.
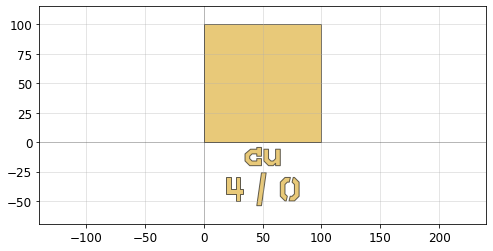
If we later decide that we actually only want layer 4, we can do that too. To do so, we set “invert_selection” to True so that all layers except 4 are removed:
[15]:
D.remove_layers(layers = [4], invert_selection = True)
qp(D)
Remapping (moving) layers
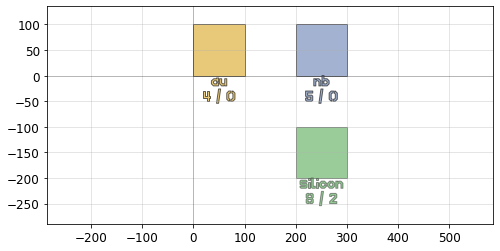
We can use the remap_layers() function to map layers arbitrarily. We’ll start again with our layerset_preview device:
[16]:
D = pg.preview_layerset(ls)
qp(D)

Now say that we wanted to move shapes on the silicon layer (8,2) to layer 99, and nb_etch layer (6,0) to layer 77 but leave the other layers alone. We do this by construction a python dictionary and passing to remap_layers()
[17]:
D.remap_layers(layermap = {(8,2): 99,
                             6  : 77,
                           })
qp(D)
Very good! We can see from the colors of the bottom polygons changing that the layer remapping worked.
Extracting / copying layers
Extracting layers
Say you want to access or copy all the polygons of specific layer(s) from an existing Device. You can do this using the pg.extract() function, which will copy layers out of one Device and put them into a new Device.
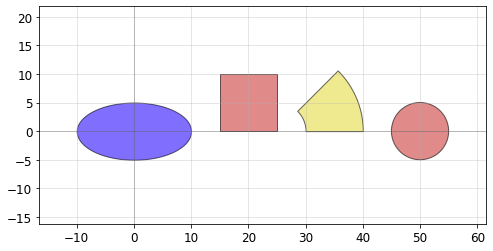
Let’s start with a Device with a few objects in it:
[24]:
D = Device()

D << pg.ellipse(layer = 1)
D << pg.rectangle(size = (10,10), layer = 2).movex(15)
D << pg.arc(width = 10, layer = 3).movex(25)
D << pg.circle(radius = 5, layer = 2).movex(50)

qp(D)

Next, let’s use pg.extract() to create a new Device which only has the objects on layers 1 and 2:
[25]:
D_only_layers_1_and_2 = pg.extract(D, layers = [1,2])
qp(D_only_layers_1_and_2)

Note that the Device created from this function is flattened
Copying layers to a new layer
Sometimes you want to copy a layer out of a Device AND remap that layer to a new layer in a single command. You can do that with the copy_layer() function. Let’s try this out by taking the above geometry:
[26]:
qp(D)
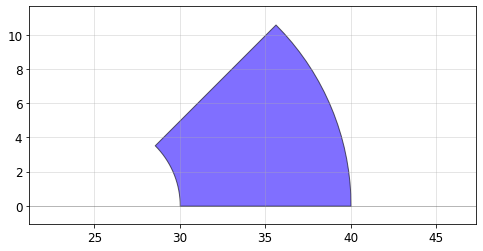
…and let’s copy the arc (yellow / layer 3) arc to a new layer (blue / layer 1)
[31]:
D_copied = pg.copy_layer(D, layer = 3, new_layer = 1)
qp(D_copied)